- Navigate the Start menu to locate programs, files, and settings.
- Create files and folders.
- Organize files and folders.
- Delete and restore files and folders using the Recycle Bin.
The Start menu provides access to every program installed on the computer. To open the Start menu, click the the Start menu button at the bottom-left corner of the screen or press the Windows key on the keyboard.
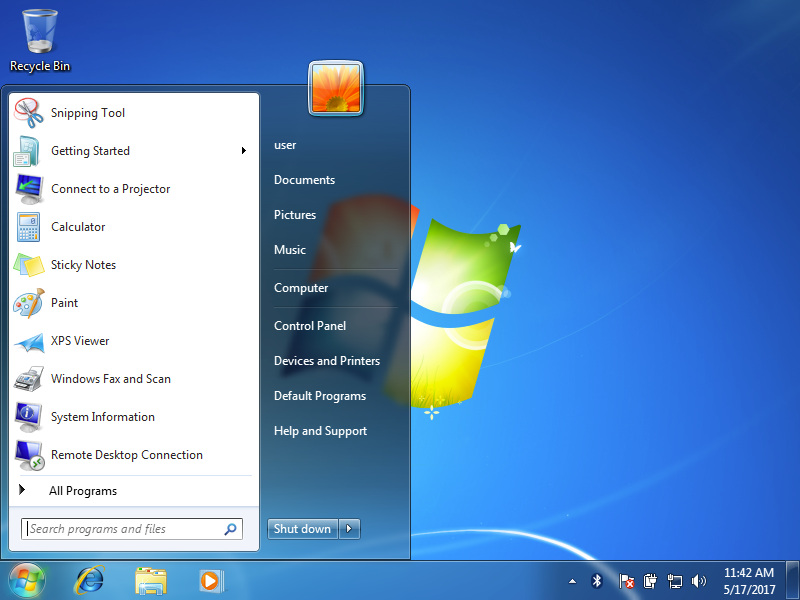

Frequently Used Programs
In Windows 7 and older operating systems, the most frequently used programs are listed in the left section of the Start menu, with the folder All Programs near the bottom-left corner. The All Programs folder leads to every program installed on the computer. Windows 10 does not have the All Programs folder, but instead lists all programs on the left section of the start menu, with the most used at the top.


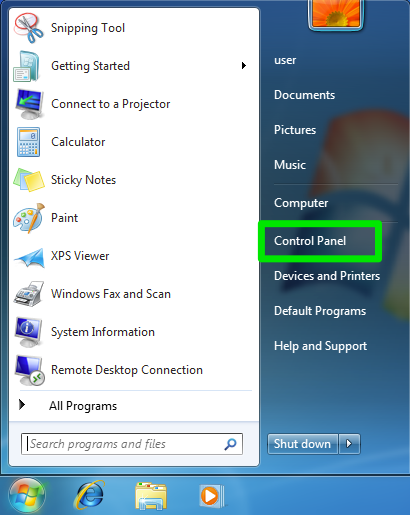
Control Panel
The Start menu also provides access to Control Panel, a settings program that allows you to change the computer’s settings. In Windows 7 and older, Control Panel is labeled Control Panel on the right section of the Start menu, while in Windows 10 it is represented by a gear icon on the left above the Start button.

The Start menu also provides a search text box or search button. Press the search button or type a word in the search box to search the computer for a program or file. (In Windows 10, the search box is not visible, but typing will trigger a search for what is being typed.)


Open a Program
Like dialog menus, the Start menu also can use the > shorthand in instructions for navigating. For example, in Windows 7, the snipping tool is at Start>All Programs>Accessories.

Mac Users
MacOS will not have a Start Menu. Instead, The Dock is a convenient area at the bottom (or side) of your screen that allows you to quickly access your favorite applications, recently used files, and system preferences. It’s customizable and always within reach, making it a central component of the macOS user experience.
Key Features of the Dock
- Application Shortcuts: The Dock provides shortcuts to your frequently used applications. You can add or remove applications to customize it to your needs.
- Recent Applications: By default, the Dock shows your three most recently used applications, which can be a quick way to switch between tasks.
- Minimized Windows: When you minimize a window, it shrinks into the Dock. Clicking on the minimized window in the Dock restores it to its previous size.
- Trash: The Dock also contains the Trash, where you can discard files and applications you no longer need. Remember to empty the Trash periodically to free up space on your Mac.
Using the Dock
- Opening Applications: To open an application from the Dock, simply click its icon. If the application isn’t currently running, clicking the icon will launch it.
- Adding Applications to the Dock: Drag an application icon from the Applications folder to the Dock to create a shortcut. The icon will remain in the Dock even if you quit the application.
- Removing Applications from the Dock: To remove an application from the Dock, drag its icon away from the Dock until you see a “Remove” label, then release it. Note that this doesn’t delete the application; it only removes the shortcut.
- Rearranging Icons: Click and drag icons within the Dock to rearrange them. This can help you organize your Dock according to your preferences.
Shutting Down
You can also use the Start menu to turn your computer off. In Windows 7 and older, the power button is usually marked Shut Down near the right corner of the Start menu. In Windows 7, clicking the arrow to the right of the Shut Down button gives you additional options. In Windows 10, the power button is a power icon located on the left directly above the Start menu button. Clicking it will also provide additional options.


A Look at Some Shut Down Options
Not every shut down option is available on every version of Windows, but here are some common shut down options and what they mean.
- Switch user: Switch between user accounts.
- Log off: Logs you out of the computer. The computer is still on, but programs are closed and you must enter your password to use the computer again.
- Lock: Locks the computer. You will not be logged out, and programs will still be running, but you must enter your password to use the computer again.
- Restart: Logs you out of the computer, closes all programs, shuts down Windows, turns the computer off, then turns the computer back on and restarts Windows. You will have to enter your password to use the computer again.
- Shut down: Logs you out of the computer, closes all programs, shuts down Windows, and turns the computer off.
- Sleep: This is sort of like pausing the computer. The screen will go dark, and you will be unable to use the computer until you wake it up by shaking the mouse or pressing a key on the keyboard. The computer will appear to be off. However, what is actually happening is that the computer will go into a low-power state. It will still be on, and programs will still be running, but the computer will use considerably less power. This is useful because waking the computer from sleep is much quicker than waiting for the computer to turn on and boot up Windows. By default, shutting your laptop lid will put the computer to sleep, and reopening the lid will wake the computer up.
Shutting Down Your Mac
It’s important to shut down your Mac properly to ensure that all your work is saved and that the system is maintained in good condition.
Steps to Shut Down Your Mac
- Close All Applications: Before shutting down, make sure to save your work and close all open applications. You can do this by right-clicking on each application’s icon in the Dock and selecting “Quit.”
- Access the Apple Menu: Click on the Apple logo in the top-left corner of your screen to open the Apple menu.
- Select Shut Down: From the drop-down menu, select “Shut Down.”
- Confirm Shut Down: A dialog box will appear asking if you are sure you want to shut down your Mac. Click “Shut Down” to confirm. You can also check the box that says “Reopen windows when logging back in” if you want your current applications and windows to reopen the next time you start your Mac.
Alternatively, you can use the keyboard shortcut Control + Option + Command + Power button to shut down your Mac immediately.